

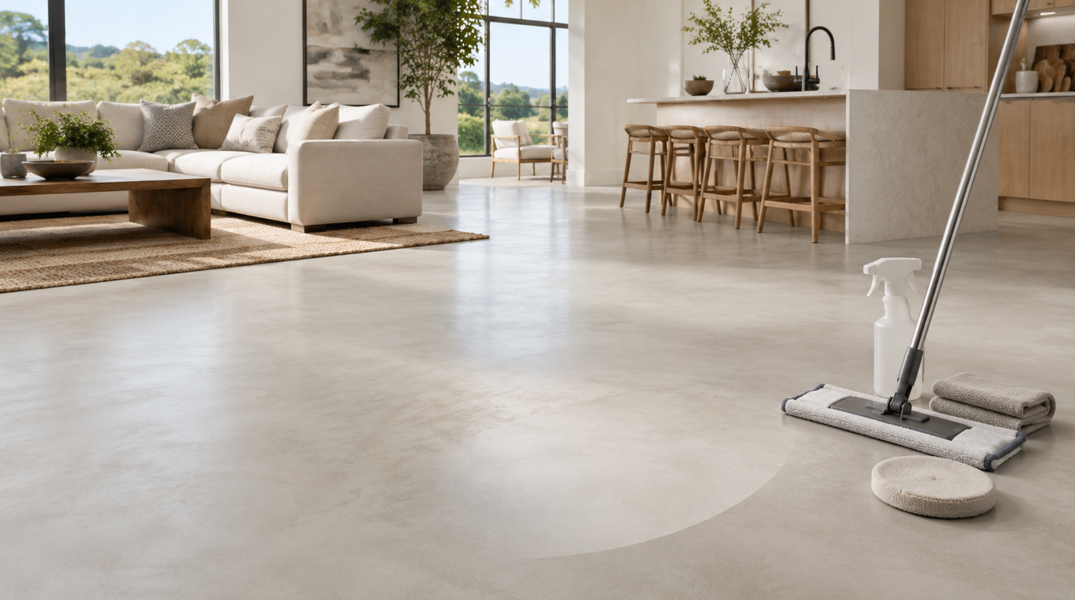
Solid surface materials are best known for countertops, sinks, shower surrounds, and wall panels, but they can also appear in custom shower floors, bathroom systems, commercial features, and other specially fabricated walking surfaces. Their smooth appearance and renewable construction can make them an appealing choice for spaces where clean lines and coordinated finishes matter.
That does not mean every solid surface product is approved for flooring. Before using any cleaner, abrasive pad, repair kit, or refinishing method, confirm the material’s manufacturer, finish, and approved application. A care method intended for a matte countertop may not be suitable for a textured shower floor or a high-gloss decorative installation.
Cedar Park homes also present practical maintenance challenges. Fine dust and outdoor grit can enter through doors, pets may track debris across wet areas, and hard Central Texas water can leave a dull mineral film when droplets dry on the surface.
As a family-owned Central Texas flooring and remodeling business, Texas Flooring Professionals helps homeowners compare materials, review installation requirements, and plan care around the way a room is actually used.
With the right routine, many solid surface installations can retain their clean, seamless appearance without an overly demanding maintenance schedule.
First, Confirm What Type of Surface You Have
“Solid surface” refers to an engineered surfacing category rather than every smooth or seamless floor. It is commonly made from acrylic or polyester resins, mineral fillers, and pigments. Because the color and pattern extend through the material rather than existing only as a thin printed layer, many solid surface products can be renewed when minor wear occurs.
Manufacturers commonly promote solid surface for countertops, sinks, wall cladding, furniture, shower components, and other interior applications. Wilsonart, for example, describes its solid surface as a blend of natural minerals, acrylic resins, and pigments, while listing countertops, sinks, and indoor wall cladding among its applications. The company also states that its solid surface is intended for interior use.
Before following a maintenance plan, find out:
Who manufactured the material
Whether it is acrylic, polyester, or a blended product
Whether the installation is approved for foot traffic
Whether the finish is matte, satin, semi-gloss, or high-gloss
Whether the surface has slip-resistant texture
Whether it is part of a shower system
Whether the installer provided care instructions
Whether the installation is under warranty
These details affect how aggressively the surface can be cleaned or refinished.
Solid Surface Is Not the Same as Other Seamless Flooring
Do not assume a floor is solid surface simply because it has no obvious grout lines. It could be:
Epoxy flooring
Polished concrete
Resinous terrazzo
Sheet vinyl
Fiberglass
Cultured marble
Porcelain panels
Acrylic shower material
A proprietary composite system
Each material has its own chemical and abrasion limits. A pad that safely renews one product might permanently alter another.
When the product is unknown, begin with the least aggressive cleaning method and contact the original installer or a qualified surface professional before attempting scratch removal.
Build a Simple Everyday Cleaning Routine
Routine cleaning is the most effective way to prevent a solid surface floor from looking dull, uneven, or prematurely worn. Fine dirt can act like an abrasive when it is repeatedly walked across a surface, especially in entrances, bathrooms, and pet-access areas.
A straightforward routine generally includes removing loose debris, washing with an approved mild cleaner, rinsing away residue, and drying the surface.
Remove Grit Before Wet Cleaning
Sweep, vacuum, or use a microfiber dust mop before applying water. This prevents sand and grit from being dragged across the surface during mopping.
Pay close attention to:
Doorways
Shower entrances
Corners
Floor-to-wall transitions
Areas around drains
Spaces beneath movable mats
Pet feeding and washing areas
Use a vacuum attachment without an exposed metal edge or stiff rotating brush that could mark the finish.
For a textured shower floor, a soft nylon brush may help lift debris from the pattern. Avoid metal brushes and aggressive scouring tools.
Wash With a Mild Approved Cleaner
For many solid surface products, warm water with mild dish soap or an approved household surface cleaner is enough for routine care. Corian’s official guidance recommends warm soapy water, an ammonia-based household cleaner, or a dedicated countertop cleaner for most residue. It advises against window cleaners because they can leave a waxy buildup that dulls the surface.
For floors or shower bases, always follow the manufacturer’s current instructions because slip-resistant textures and finishes may need different care from countertops.
A safe starting process is:
Remove loose grit.
Apply a diluted, manufacturer-approved cleaner.
Allow only the recommended contact time.
Agitate gently with a microfiber mop, cloth, or soft brush.
Rinse thoroughly with clean water.
Dry the surface where practical.
Avoid mixing cleaning chemicals. More product does not necessarily improve cleaning and may leave residue behind.
Drying Helps Prevent Mineral Film
Cedar Park has areas with mineral-rich water, and droplets left to evaporate can form a hazy film. Corian notes that water allowed to dry can create mineral buildup that makes the finish look blotchy or uneven. Its care guidance recommends wiping the surface completely dry after cleaning or spills.
Drying an entire floor after every cleaning may not always be practical, but it is useful around:
Shower drains
Floor edges
Benches
Corners
Fixtures
Areas where water regularly pools
A squeegee followed by a microfiber cloth can make this process quicker in shower areas.
Match the Cleaning Method to the Mess
Not every mark is a scratch. Residue, soap film, minerals, shoe transfer, and surface contamination can all create lines or dull patches that look like physical damage.
Start with gentle cleaning before reaching for an abrasive pad.
Soap Film and Body-Care Residue
Shampoo, conditioner, body wash, oils, and other products can leave a slippery or cloudy layer on shower floors.
Use an approved cleaner designed to remove soap residue, then rinse thoroughly. A soft nylon brush may help on textured surfaces.
Do not apply furniture polish, floor wax, oil soap, or products that promise a glossy protective coating unless the manufacturer specifically approves them. Added coatings can change the appearance and may reduce traction.
Hard-Water Deposits
A white or cloudy patch may be a mineral deposit rather than damage to the material.
Begin with the manufacturer’s recommended mineral-removal process. Some products tolerate mild acidic cleaners, while others have more specific restrictions. Never assume vinegar, calcium remover, or limescale products are acceptable.
Where mineral buildup is recurring, improve the routine by:
Squeegeeing after showers
Drying water around the drain
Fixing dripping fixtures
Improving ventilation
Cleaning before deposits become heavy
Following the manufacturer’s recommended frequency
Shoe and Rubber Marks
Dark marks from footwear, chair feet, mats, or equipment may sit on top of the surface.
Try mild soap and a microfiber cloth first. If the mark remains, use only the cleaner or pad approved for that finish.
Do not scrape the mark with a razor blade, metal tool, or knife. A sharp edge can turn a removable transfer mark into a genuine gouge.
Spills and Household Chemicals
Prompt cleanup helps reduce the likelihood of discoloration or finish damage. Corian advises flushing accidental exposure to strong chemicals with plenty of soapy water. Its examples include paint stripper, oven cleaner, acid drain cleaner, metal cleaner, acetone-based nail polish remover, and products containing methylene chloride.
In bathrooms, be particularly careful with:
Drain-opening chemicals
Hair dye
Nail products
Toilet cleaners
Rust removers
Paint and adhesive removers
Concentrated disinfectants
Follow the product manufacturer’s directions for accidental exposure. If discoloration, softening, cracking, or surface change appears, stop cleaning and request professional advice.
Know the Difference Between a Scuff and a Scratch
Correctly identifying the mark can prevent unnecessary sanding or buffing.
A Scuff Usually Sits on the Surface
A scuff often comes from rubber, plastic, footwear, furniture, or equipment. It may change or disappear when cleaned with a damp cloth.
Signs of a scuff include:
No visible groove
A mark that changes when wet
Color transferred onto the surface
Little or no change when viewed from different angles
Removal with mild cleaner
A Scratch Removes or Disturbs Material
A scratch may catch a fingernail or remain visible after the surface is clean. It often becomes more noticeable when light reflects across it.
Minor scratches may appear as:
Fine pale lines
Dull areas
Swirl marks
Directional abrasions
Slightly rough patches
Deeper damage may include:
A groove that catches a fingernail
Chipping at an edge
A crack
An indentation
Damage around a seam or drain
A change in the surrounding texture
Solid surface is often described as renewable because its composition continues through the material. Corian states that minor cuts and scratches can frequently be removed, while deeper damage and high-gloss restoration are better handled professionally.
That repairability is an advantage, but it is not permission to sand every visible mark.
Use Caution With Do-It-Yourself Scratch Removal
A repair that looks successful in one small spot can create a larger visual problem if the repaired area no longer matches the surrounding finish.
This is especially important on floors because light travels across a broad horizontal surface. A differently polished patch may stand out from several feet away.
Start by Cleaning the Area
Before deciding that a scratch needs refinishing:
Remove loose debris.
Wash the area with mild soap and water.
Rinse it thoroughly.
Dry it.
View it from several directions.
Check whether a fingernail catches in the mark.
Corian recommends cleaning a scratched area with hot soapy water and drying it before beginning restoration.
Identify the Existing Finish
A matte surface is generally easier to blend by hand than a semi-gloss or high-gloss finish.
Corian’s current guidance provides different sanding and buffing sequences for matte and semi-gloss finishes. It also warns that creating a uniform semi-gloss finish by hand can be challenging and recommends professional finishing for larger areas or where reflected light reveals unevenness. High-gloss restoration is best handled professionally.
The correct abrasive depends on:
Manufacturer
Product composition
Color
Pattern
Finish level
Texture
Location
Depth of damage
Do not copy a grit sequence from an unrelated product.
Avoid Spot-Sanding Without a Blending Plan
Sanding only the visible line can create a low spot, halo, or patch with a different sheen.
Where manufacturer-approved repair is appropriate, the refinishing area may need to extend beyond the scratch so the finish can be blended gradually. The movement pattern and final abrasive also need to match the original finish.
A textured, slip-resistant floor presents an additional concern. Sanding may flatten the texture and affect traction. Leave this type of repair to a professional unless the manufacturer provides a specific restoration procedure for the flooring system.
Dark Colors Show Wear More Readily
Dark and highly pigmented surfaces often reveal scratches, dust, and everyday abrasion more clearly than lighter or patterned colors. Both Corian and Durasein note that scratches may be more noticeable on darker colors or glossier finishes.
This does not necessarily mean the darker surface is performing poorly. The contrast simply makes light abrasions easier to see.
A uniform maintenance approach is usually better than repeatedly polishing isolated lines whenever they appear.
Choose Pads, Cleaners, and Tools Carefully
Product labels such as “non-scratch,” “heavy duty,” and “all-purpose” do not guarantee compatibility with solid surface.
Check the official care guide before using a new item across the full installation.
Useful Routine-Care Tools
Depending on the manufacturer’s instructions, a practical kit may include:
Microfiber cloths
A microfiber mop
A soft-bristle nylon brush
A non-metallic squeegee
Mild dish soap
An approved surface cleaner
Clean rinse water
Soft absorbent towels
A vacuum with a suitable hard-surface attachment
Keep floor-care tools clean. A microfiber pad containing trapped grit can scratch even when the fabric itself is soft.
Abrasive Pads Are Not Interchangeable
Colored abrasive pads represent different levels of aggression, but color systems can vary by brand. Do not choose a pad based only on its color.
Durasein’s care guidance, for example, describes a specific sequence involving a maroon Scotch-Brite pad followed by a white pad and non-abrasive cleanser for certain light scratches on its countertop material. It recommends trained experts for severe scratches.
Corian provides different abrasive sequences according to finish and color.
These are manufacturer-specific instructions for particular surfaces. They are not universal recommendations for every solid surface floor.
Test in an Inconspicuous Area
When the care guide permits a product but you have not used it before, test it somewhere discreet.
Check the area after it is:
Clean
Dry
Viewed under daylight
Viewed under artificial light
Seen from multiple angles
A surface can look fine while wet and reveal a sheen change after drying.
Prevent Scratches Before They Begin
Daily habits can reduce the need for restoration.
Control Dirt at Entrances
Use suitable entry mats to capture grit before it reaches the surface. Mats need to be:
Compatible with the floor
Non-staining
Slip-resistant
Easy to lift and clean
Fully dried before being replaced
Avoid rubber or chemical-backed mats unless the surface manufacturer approves them. Some backings may discolor flooring materials or trap moisture.
Protect Furniture and Equipment
Use appropriate pads or glides beneath movable items. Keep them clean because felt can collect grit and become abrasive.
Do not drag:
Benches
Storage units
Freestanding vanities
Cleaning equipment
Laundry appliances
Heavy decorative items
Lift and carry them or use approved moving equipment.
Manage Pet Traffic
Pet claws, tracked-in grit, water bowls, and bathing areas can contribute to visible wear.
Helpful habits include:
Keeping nails trimmed
Wiping paws after outdoor activity
Cleaning grit promptly
Using an approved mat near water bowls
Drying standing water
Checking beneath mats regularly
Avoid Using Harsh Tools
Do not use:
Steel wool
Metal scrapers
Razor blades
Unapproved drill brushes
Pumice stones
Aggressive sanding discs
Stiff wire brushes
Steam cleaners unless specifically approved
Heat, chemicals, and abrasion can alter the finish even when the surface initially appears undamaged.
Create a Weekly and Seasonal Care Plan
A planned routine is easier than responding after buildup becomes visible.
Daily or After Use
For shower floors and frequently used wet areas:
Rinse away residue.
Remove hair and debris.
Squeegee standing water.
Dry areas prone to mineral buildup.
Address spills promptly.
Weekly
Remove loose grit.
Wash with an approved mild cleaner.
Agitate textured areas gently.
Rinse thoroughly.
Inspect drains, seams, edges, and transitions.
Clean and dry mats before replacing them.
Monthly
Check for soap film or mineral haze.
Examine high-traffic zones for uneven wear.
Clean beneath movable objects.
Inspect furniture pads and glides.
Review any recurring stain or moisture issue.
Seasonally
Cedar Park households may bring in more dust during dry periods and more mud or water during storms.
At the beginning of a new season:
Deep-clean entrance mats.
Replace damaged furniture pads.
Check exterior door seals.
Review shower drainage.
Inspect caulked transitions.
Photograph changes in cracks or seams.
Schedule professional care when the finish looks uneven.
Routine inspection helps distinguish ordinary wear from an installation or moisture problem.
Know When to Call a Professional
Some damage requires more than surface cleaning.
Request an assessment when you find:
Deep scratches
Gouges
Cracks
Chipped edges
Open seams
Movement around the drain
Persistent discoloration
Chemical damage
Heat damage
A large uneven patch of sheen
Loss of slip-resistant texture
Recurring water beneath the installation
Wilsonart states that scratches, gouges, and cracks in its solid surface can be renewed or repaired by a certified fabricator. Corian similarly recommends professional help for deeper scratches and high-gloss restoration.
A professional can identify whether the issue is limited to the finish or connected to a seam, substrate, drain, support, or installation detail.
Do not continue sanding a crack or deep gouge in an attempt to make it disappear. Removing material may make a repair more involved.
Coordinate Floors With Other Solid Surface Features
Many homeowners choose solid surface because it can create a coordinated look across vanities, integrated sinks, shower walls, benches, and other bathroom elements.
Manufacturers such as Durasein promote solid surface for countertops, sinks, and shower systems, highlighting its nonporous, repairable construction. Its current shower panels are designed to create broad, low-seam wall surfaces and coordinate with matching half-inch materials used elsewhere in a room.
When comparing finishes, remember that a floor usually has different performance needs from a countertop or wall. It may require:
Greater traction
A more textured finish
Drainage planning
Approved wet-area installation
More frequent removal of grit
Different cleaning tools
The care principles used for solid surface countertops, including prompt spill removal and manufacturer-approved cleaning, can provide a useful starting point. However, the flooring or shower-system documentation always takes priority.
Using related colors does not require using the same finish everywhere. A smooth vanity and a textured shower floor may coordinate visually while performing different jobs.
Keep Solid Surface Looking Consistent
The best solid surface care plan is gentle, regular, and product-specific.
Remove grit before wet cleaning. Use mild approved products. Rinse away residue. Reduce mineral buildup by drying wet areas. Confirm whether a mark is a scuff, stain, or genuine scratch before trying an abrasive repair.
Minor wear can often be renewed because many solid surface materials are consistent through their thickness. That repairability is valuable, but refinishing still needs to match the manufacturer, color, texture, and original sheen.
For Cedar Park homeowners, local conditions also matter. Dust, pets, hard-water residue, and frequent bathroom use can all affect appearance. A short routine performed consistently is more effective than occasional aggressive cleaning.
Texas Flooring Professionals offers professional product guidance, installation services, design support, and shop-at-home appointments for homeowners throughout Central Texas. To discuss solid surface options, coordinated bathroom materials, or concerns about a current installation, reach out to us for personalized assistance.


